Efficiently Manage and Collaborate APIs with Postman
Postman is an interactive tool that helps to build and test APIs. Let's take a look at how to setup postman for efficient collaboration with your team members
Create Workspaces
A workspace allows you to share and collaborate on APIs with your team members in real time.
One can create Personal Workspaces to manage different projects. Personal workspaces are visible only to you.
Or create team workspaces to allow easy collaboration with team members. Team workspaces are visible to all the members added to the workspace. We can manage the role and permissions of each team member.
Here we will learn how to create and use team workspaces:
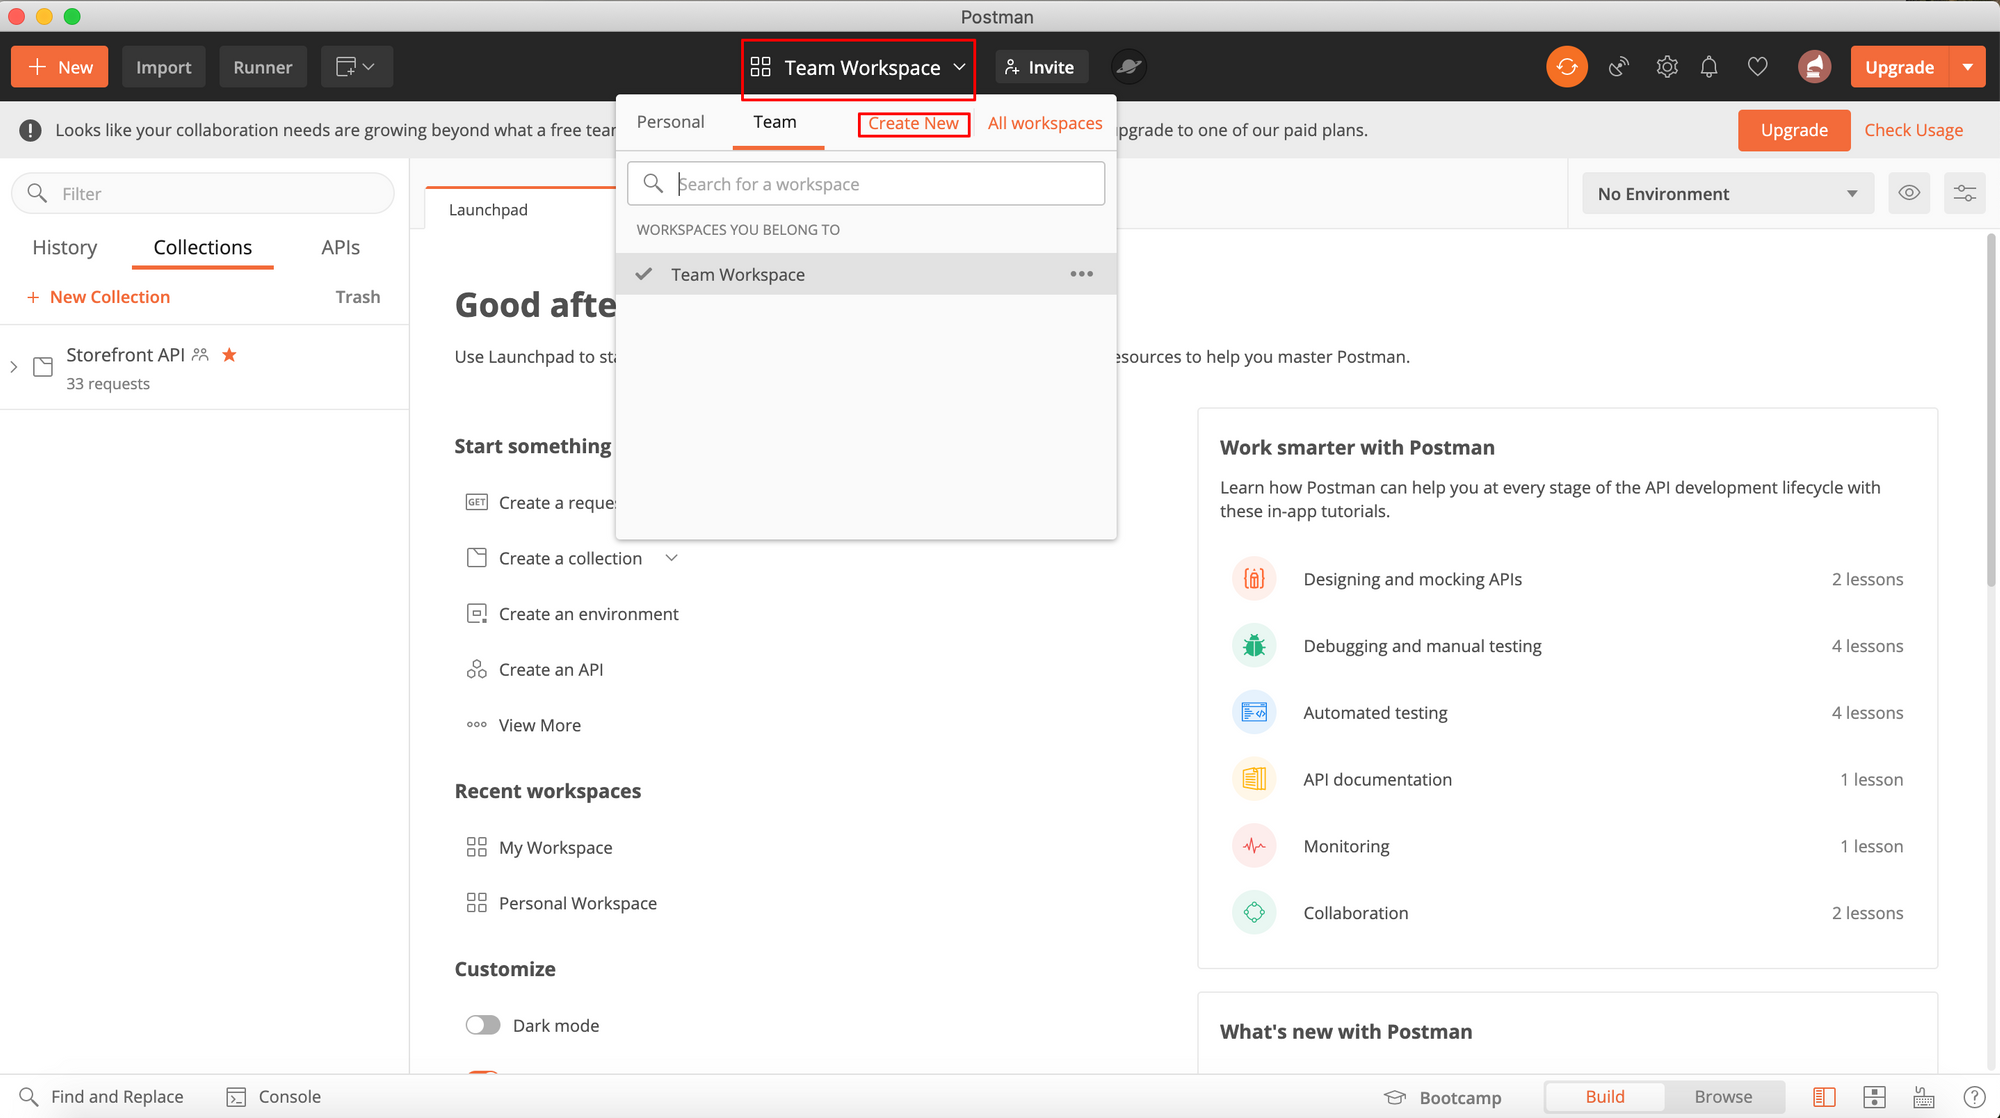
- Click on Team Workspace option and click on create new
2. Fill in the details i.e name, summary etc. Select Team in the Type field, as we are creating a team workspace.
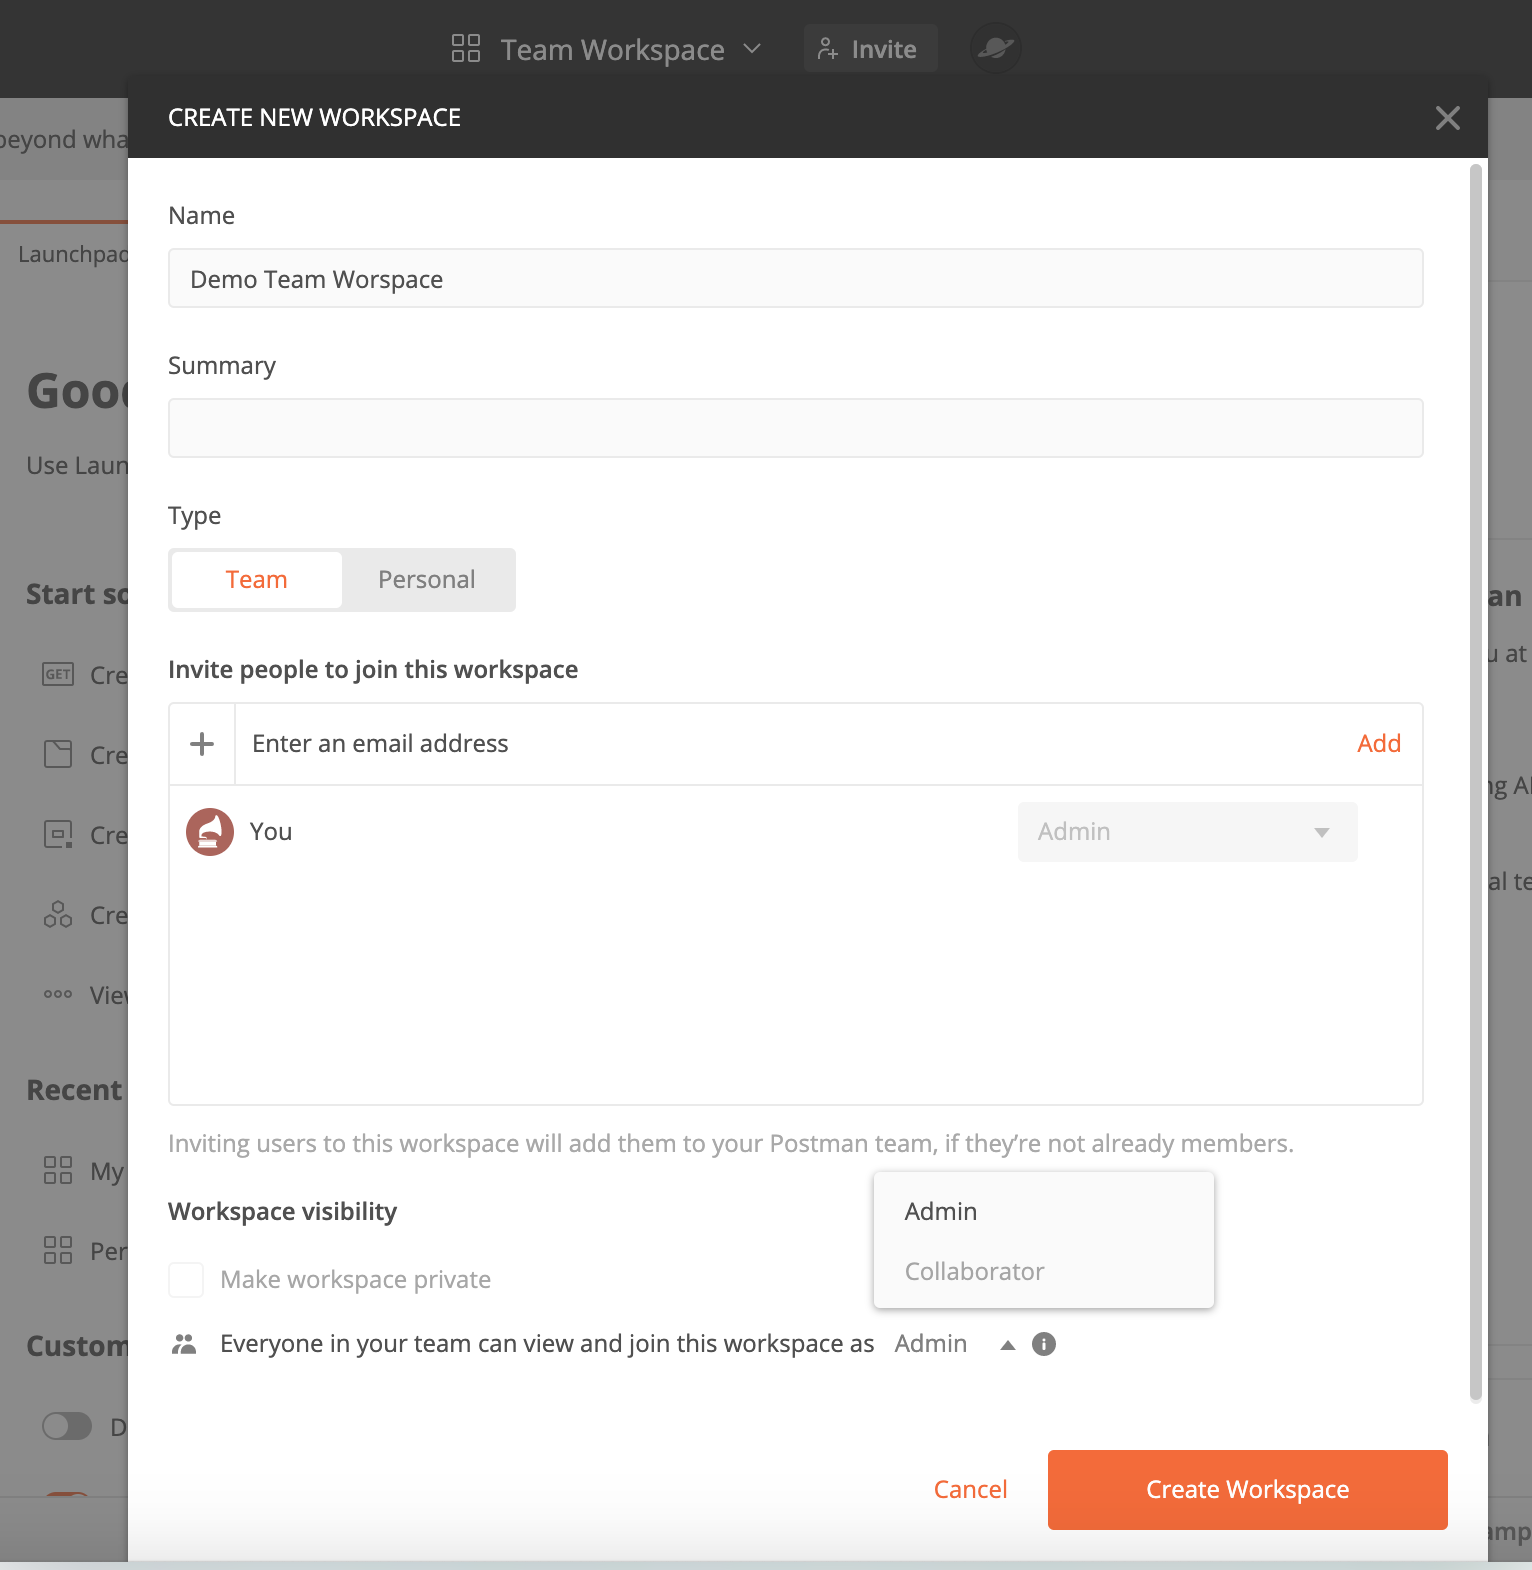
3. Enter the email address for each of your teammates you want to share the workspace with. An invitation will be sent to the invited members to join the workspace.
Add Collections to the Workspace
Collections allow you to group, manage and share your APIs efficiently. You can group APIs into separate collections for the easy of use and sharing. For instance you can have different collection for different projects, to have better arrangement of APIs for quick and easy access.
Although we have a history of all the APIs that we create and test in the history tab, but it is quite complicated to search through the APIs in the history tab, as it simply lists the APIs in the order they were used without any distinction based on folders. Hence collections provide the ease of differentiating the APIs based on different projects, thereby providing easy search and sharing.
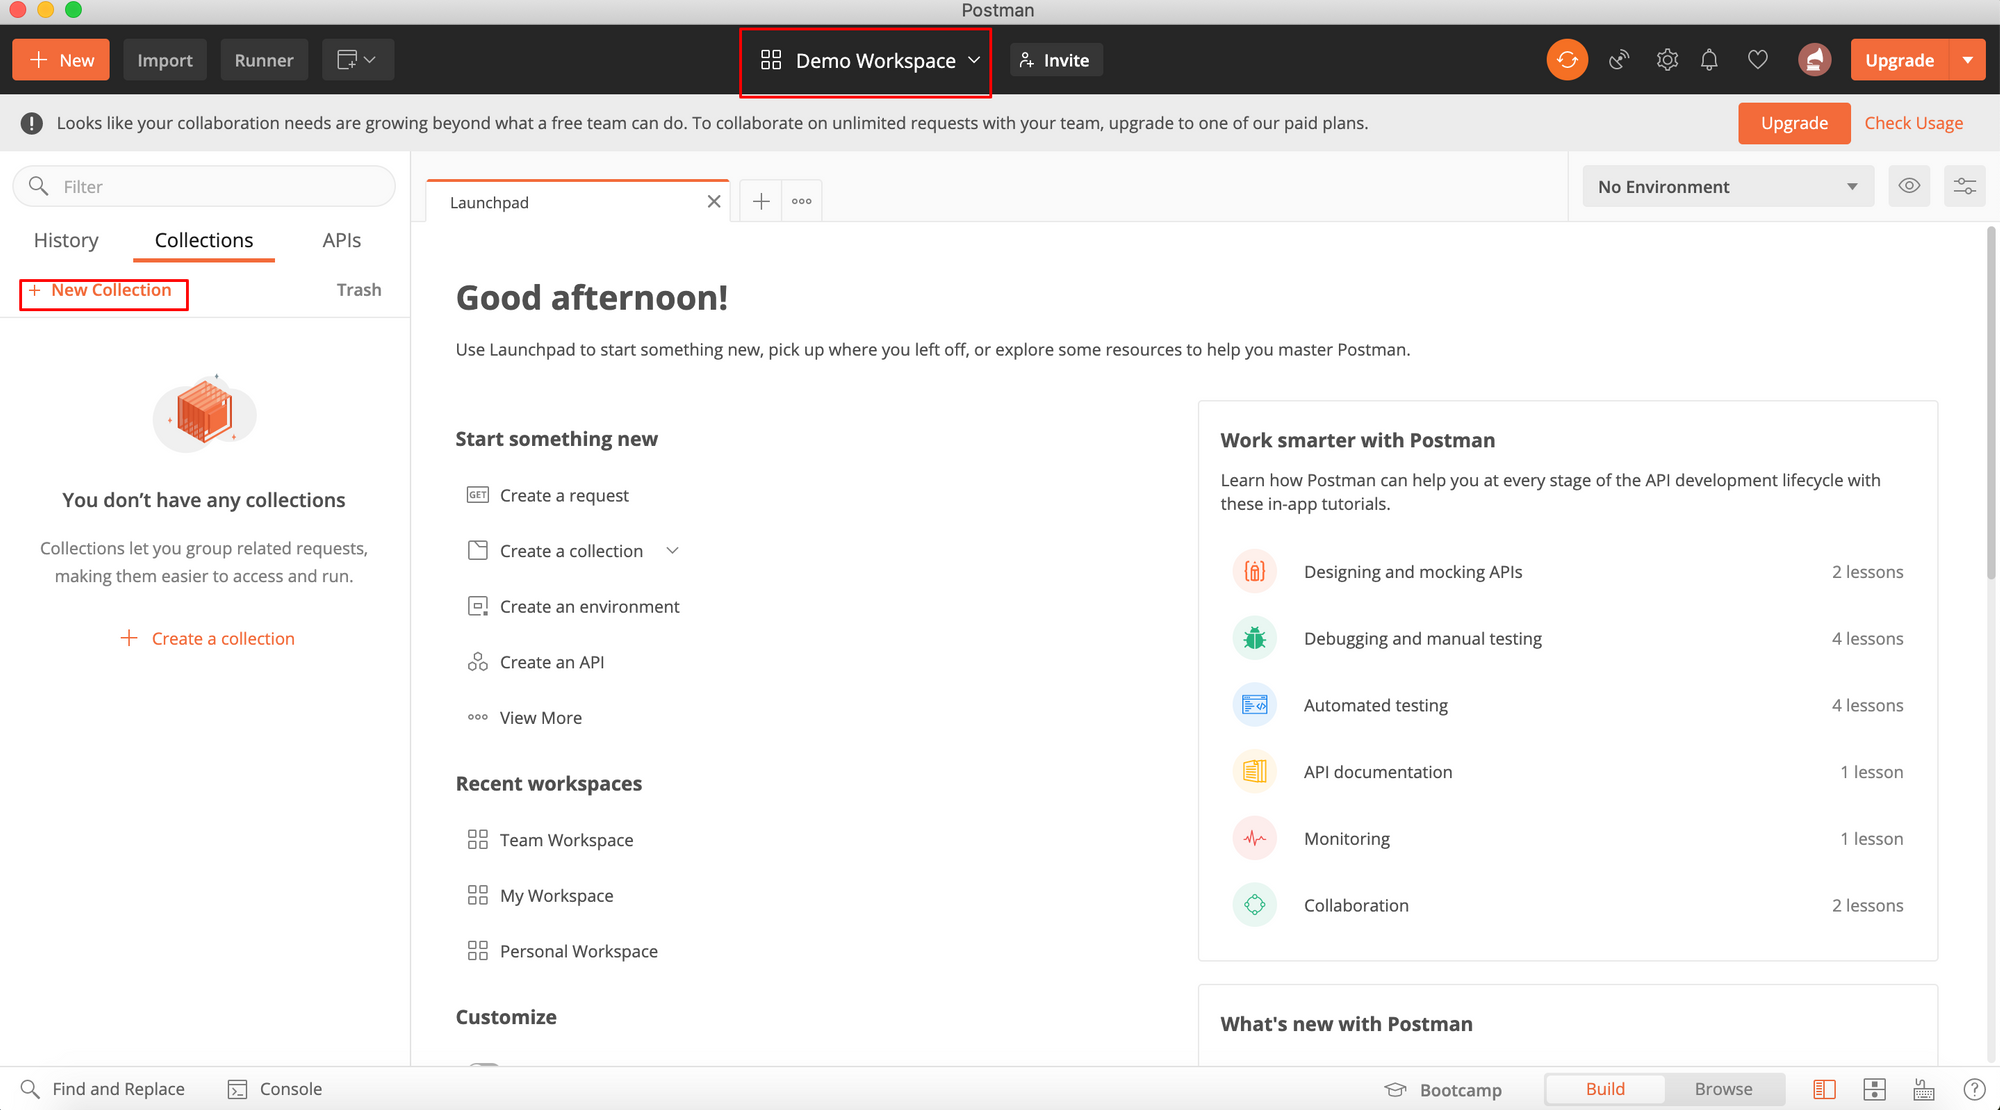
Let's create a collection in our Demo workspace. Make sure the corrected workspace is selected.
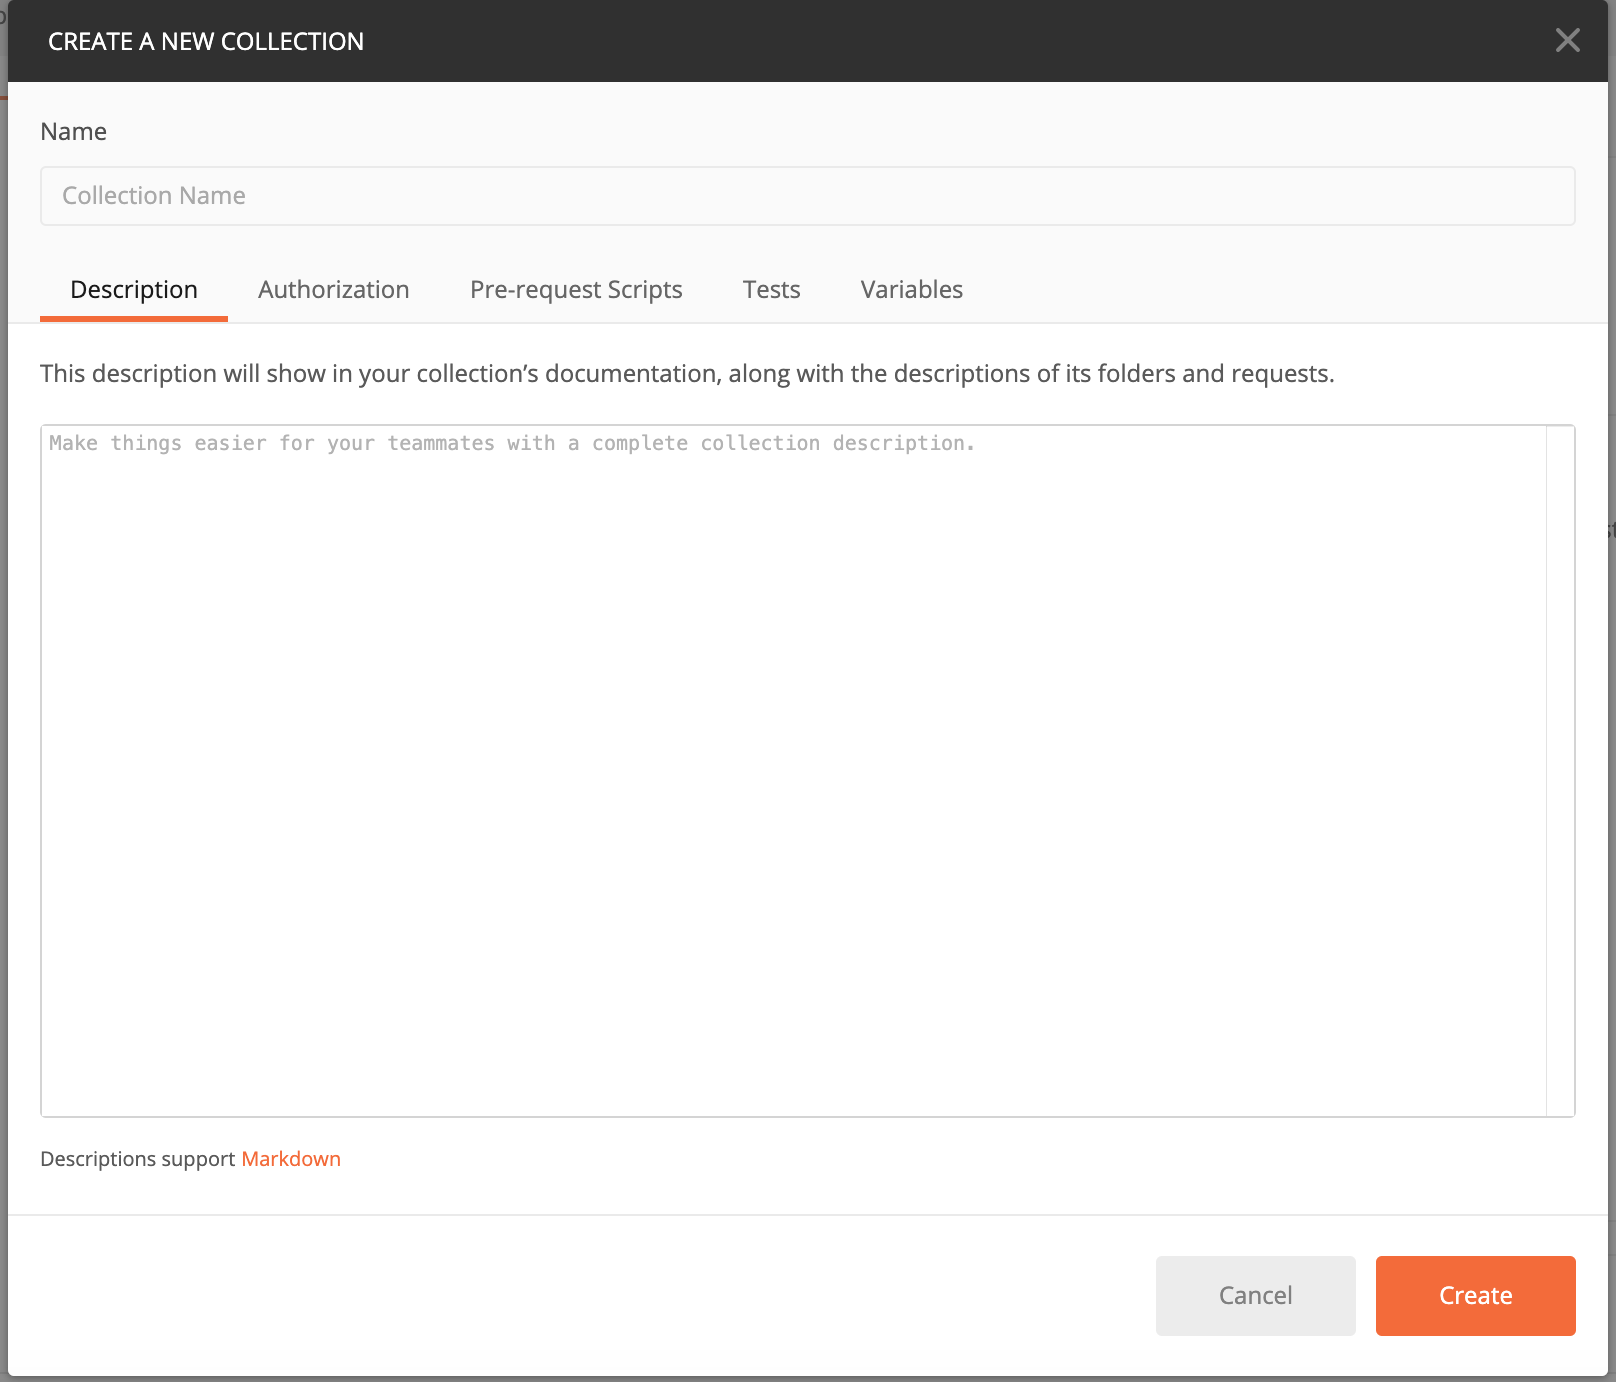
- Click on the new collection link in the collections tab.
2. Add a descriptive name and description for the collection. Click on create and the collection is ready. All your collections will be visible in the collections tab.
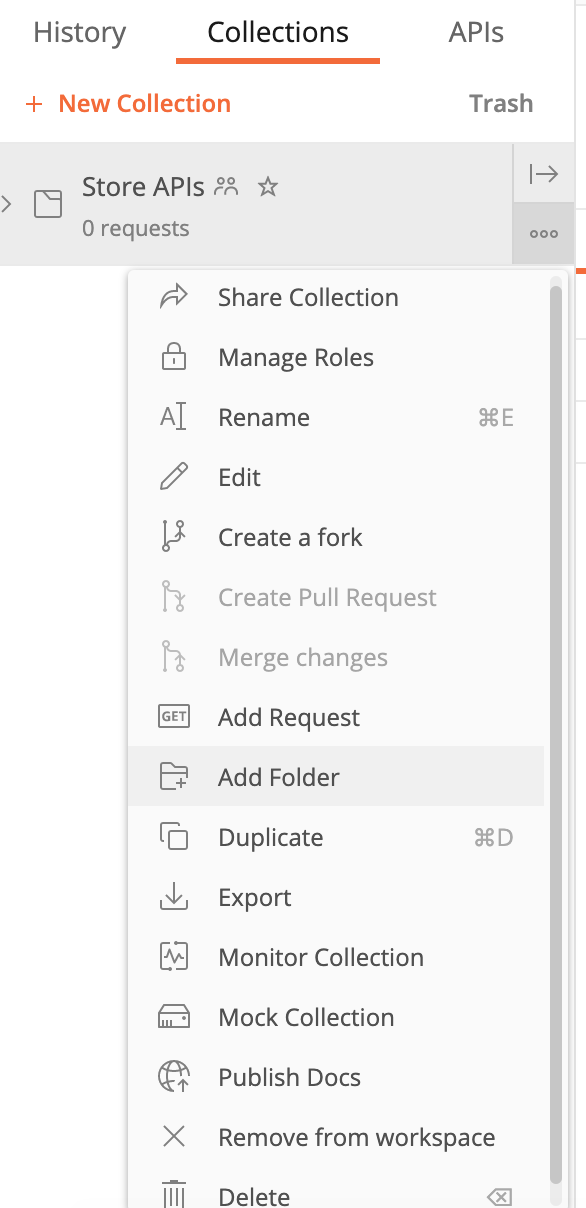
Within the collections we can group requests into separate folders e.g creating separate folder for each module. We also have publish docs option that will generate a well formatted API documentation for your collection.
Environments and Variables in Postman.
Just Like our application environments we can create separate environments on postman. Setting up environment variables helps you test APIs in different environments without the need to create separate APIs for each environment. All you need is to set up environment specific variables. We will use these variables in our APIs, just select the environment in which you want to test the APIs and all the variables will take the values as defined for the selected environment. We can add variables for the reusable values in the requests, and use those variables in the URL, params, body etc.
A typical example to understand the use of environment variables is the API Root URL. We will add environment specific variables for root URL and this will eliminate the need to modify API while testing for different root URLs or creating separate APIs with different root URLs.
Let us see how we can create and add variables in our APIs.
- Click on the eye icon as marked in the screenshot.
- Click on the Add link in Environment
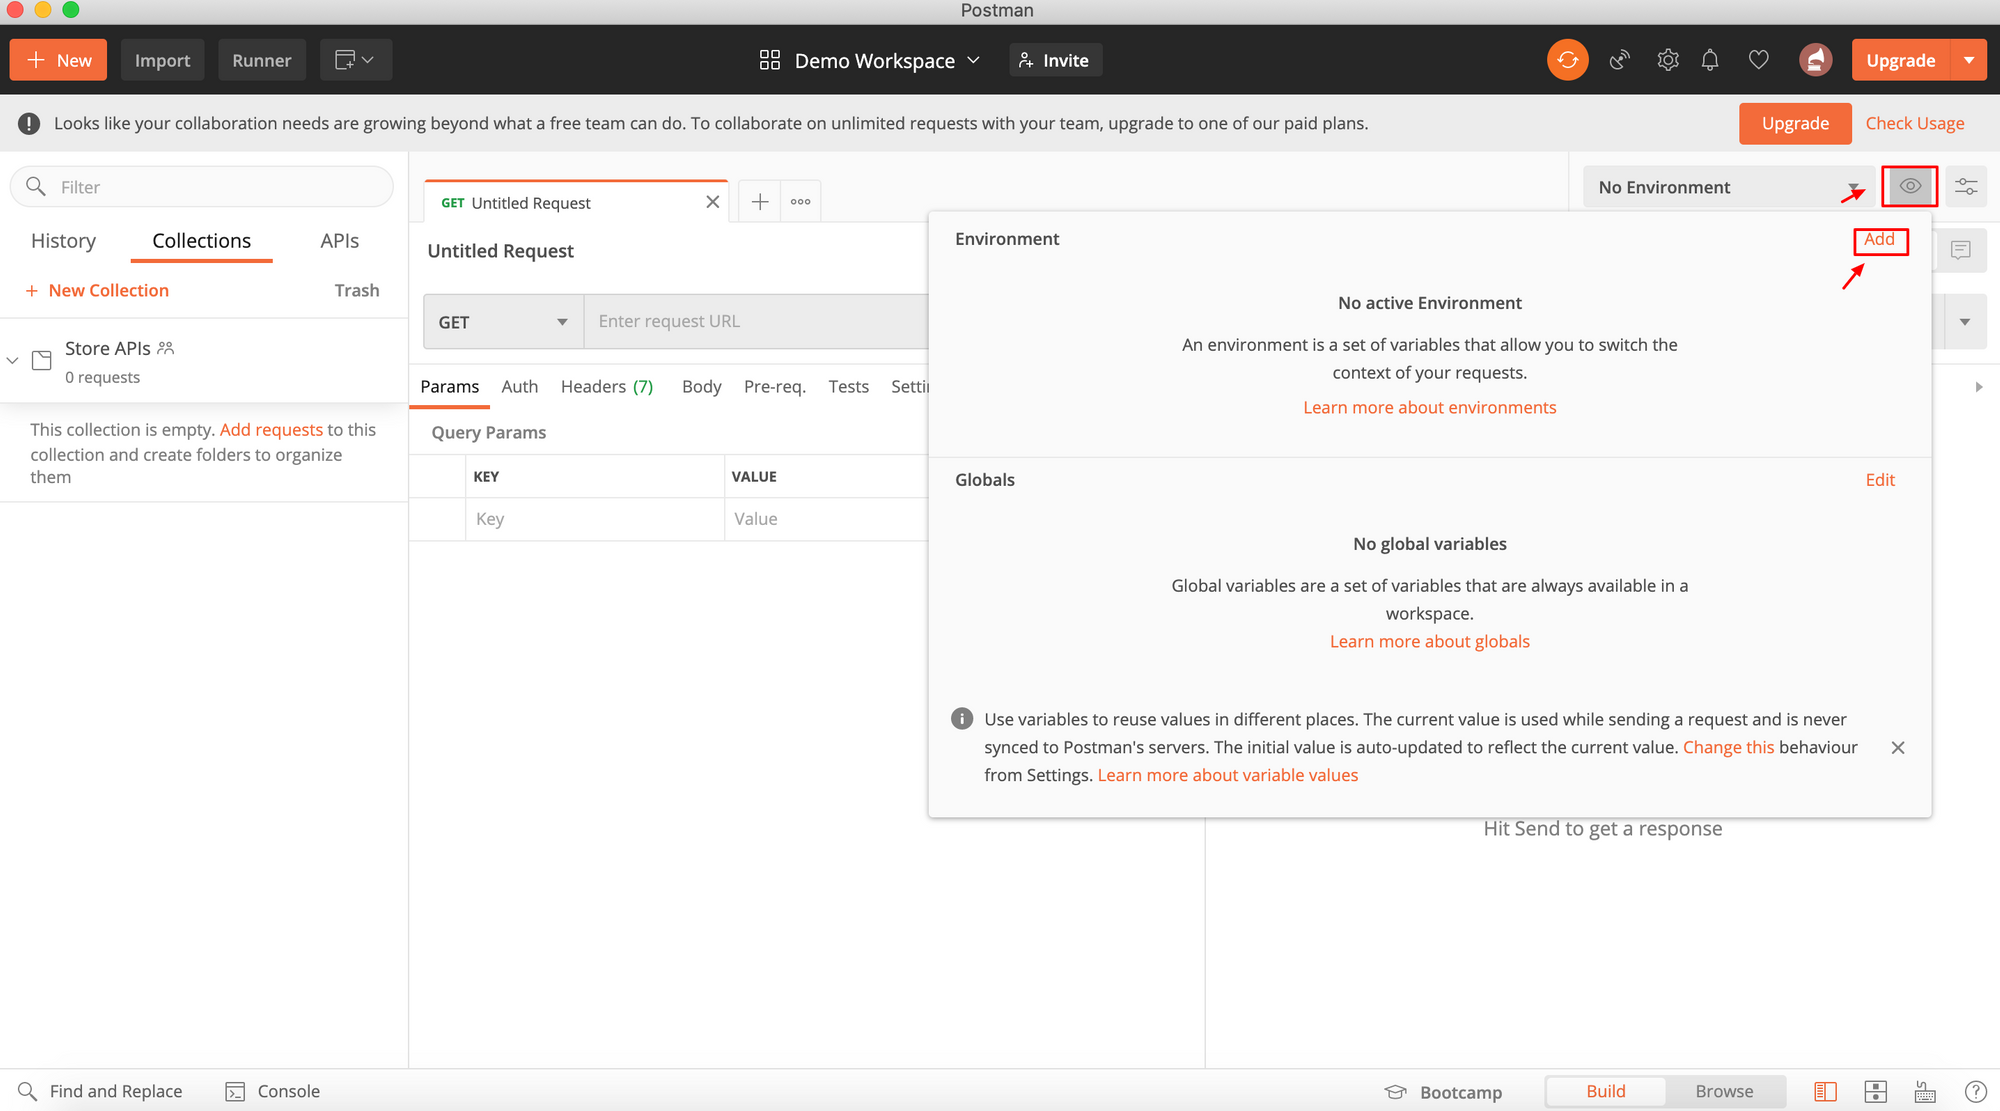
3. Add a descriptive name of the environment e.g local/staging/production etc. Add the variables. In this example we have added an environment named as local. Here we are adding a variable named rootUrl having initial value as localhost:3000. By default current value column will take the value same as initial value, but we can modify it as per our requirements.
Difference in the initial and final value is that the initial value is shared with the team members when you share the variables, whereas current value is never synced. Current value is used while sending a request. Thus we can add the current values as per our requirements without affecting the values for other team members, collaborating on the same workspace.

4. Similarly we can add create a staging/production environment and add rootUrl variable to them with the corresponding values.
How to use variables in the APIs
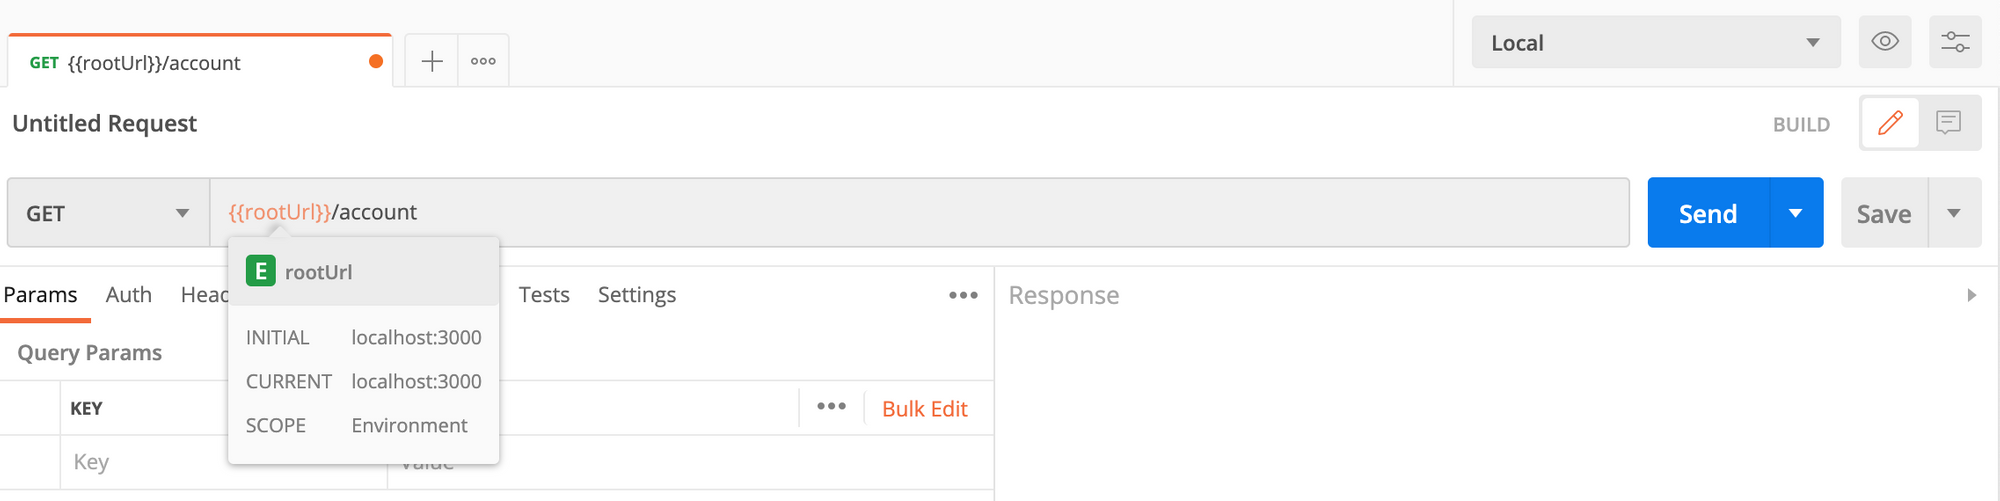
Replace the Root URL in the API url with the root_url variable that we added above. By convention the variables are written surrounded by two curly brackets i.e {{rootUrl}}
- Before using variables the API URL looks like localhost:3000/account.

2. After adding the variables the URL changes to {{rootUrl}}/account. Hovering over the variable will provide you details about the variable, its value and scope.
Conclusion
This is how we can use workspaces, collections and environment variables for easy management of requests and collaboration among team members.